Showing posts with label tutorials. Show all posts

Monday, February 21, 2011

Gotta a Hole in One?

First of all,
let me apologize
to the
person
who commented on my other posting of this tutorial.
I have had to go in
and redo the whole thing
because blogger
is acting stupid
and wouldn't
let me do any edits.
I loved your comment
and feel bad for having to delete it.

I realized that
jeans with holes in them
are a bit of a fashion
statement
these days.

However,
I was raised in a time
when one ironed their
blue jeans.

So, jeans with holes in them
kind of
go against my
grain.
(no pun intended)

I raised 4 boys.
Hand-me-downs were
just a way of life
when it came to blue jeans.
So patches were
common.
It was a part of
clothing
my family
without going broke.

Here's how I have always done it.
Try not to let your holes get too big.
However, I have patched worse and they've turned out okay.

Saturday, November 27, 2010

Journal/Notebook Tutorial - My Version

I know, I know, I know.
There are tons of tutorials
about journal/notebook covers out there.
I've seen them.
I'm going to add one more
to the mix.
My version.
Not that my way
is the only way.
Heavens no.
This is just my technique.
Good or bad.
It works for me.
I can put one of these babies together in about a half an hour.
Yes.
Half an hour.
In this season of
make sure everyone gets a gift,
make it inexpensive,
make it easy,
make it cute,
but most of all
make it
fast,
I felt that this little journal/notebook cover
fit the bill.
So, I'm sharing.
Apologies in advance for
the photography
(I'm just not an expert).
Tutorials are still a bit of an
unknown territory
for me.
Questions?
Leave me a comment and e-mail.
I'll try to clear up any questions quickly.

First, you will need:

1 composition book
23" x 12" of fashion fabric
20" x 6.5" of embellishment fabric
coordinating thread
pins
scissors
seam gauge or ruler
sewing machine


 Make sure the fabric is prewashed and pressed nicely.
Fold the fashion fabric in half (short ends together)
and press a nice crisp crease.
Open the fabric and lay the notebook spine
along that crease.
 With a marking tool,
(I broke a sewing commandment and just used a regular old pencil),
make a mark along the long edge of the book.
This should be on the INSIDE of the fabric.
 Fold right sides together along this line and press a nice crease.
Doing this will help us to know the edge of the book
giving us the book's boundries as we are doing our embellishments.
Trust me, this will save you tons of aggrivation
as you are decorating the journal.
 Do this on both ends of the fabric.
These are also the pockets for the notebook's flaps to slide into.
 Now for the embellishment.
Let me just say that I have my own style with all of these covers
and
this is the point where you decide how and with what to
embellish your cover.
Go wild
and
do whatever
you want to now.
The fabric is flat and easy to work with.
The creases that you have ironed into the fabric
show you exactly where the edge of the book is
and where the spine will lay.
So, have some fun with it and make it special.
But, here's what I do.
 I take the 20" x 6.5" fabric and press it really nice.
I then fold it in half lengthwise and press again.
 I then open up the fabric and fold one lengthwise edge
up to the crease and press.
 I do this on both sides and
 come up with something that looks like this.
I then turn up the one of the short ends about 3/4"
and press it down nice and flat.
  Opening that fold up, I take the corner and fold
it on the bias matching the fold lines.
I use the bias line on my ironing board for a guide.
Press.
 I then refold the lengthwise side back along its crease like so.
 I refold the other fold along its
crease and press.
I repeat this process on the other corner.
 I now have two nice sharp corners.
I lay this strip of fabric right along the center crease
about 3-3/12" from the top edge.
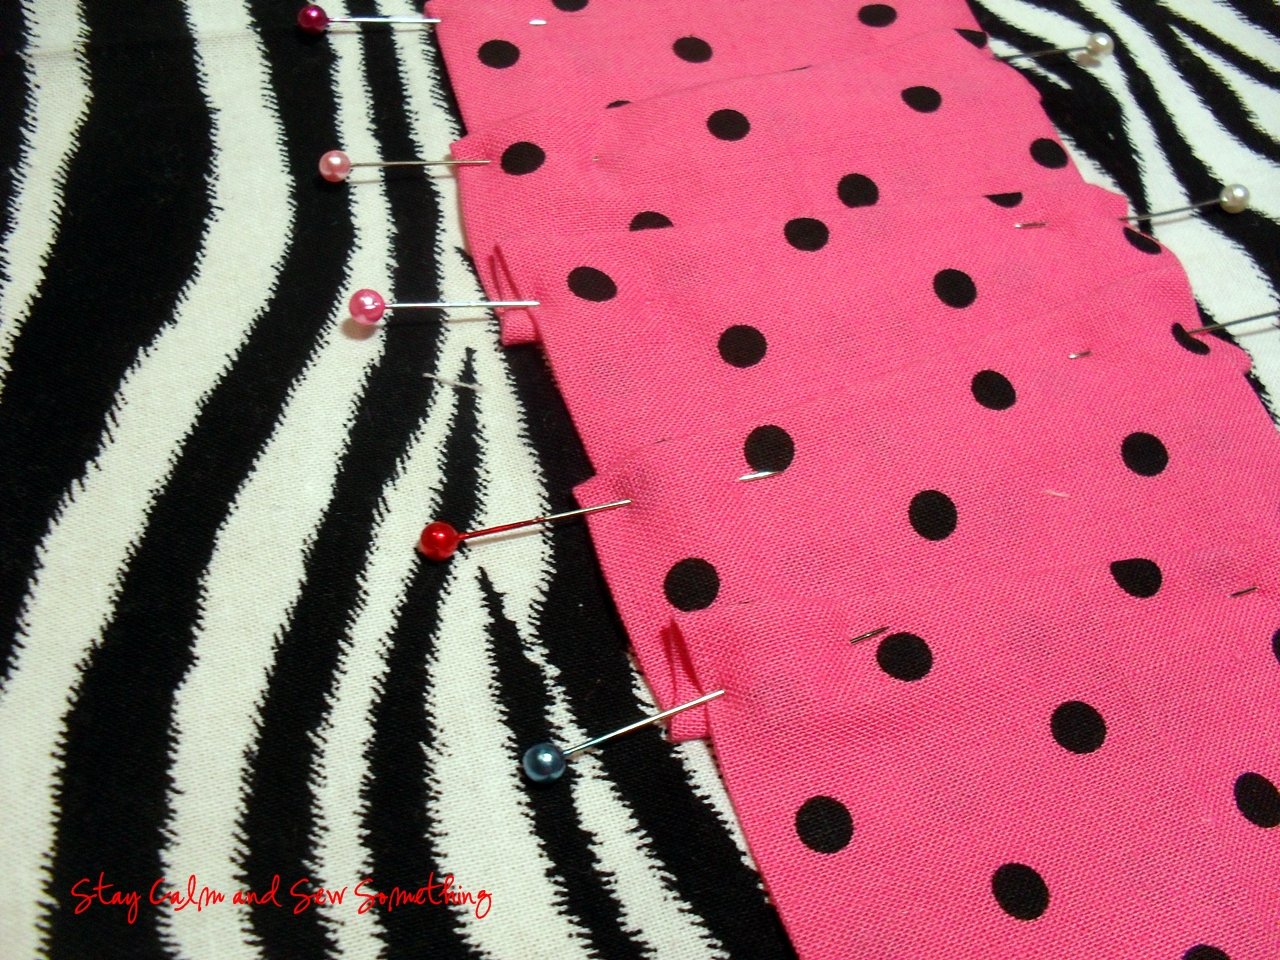
Pin in place.
 I then begin my pleats.
No rules on the pleats.
I just fold it.
This can be off a bit crooked or nice and straight.
Depends totally on my mood.
If I've made tons of these in one day,
they may be just pretty crooked.
That's style, isn't it?
 I'm a real pin freak and pin, pin, pin.
I like control over my fabric and
not allow it to have
control over me.
I stop the folds just before the crease that marks the edge of the book.
I just lay out the fabric and pin it down to be sew flat.
This wraps the embellishment fabric
into the inside of the book.
A nice touch, I think.
But you could stop it at the crease, especially if you were short on fabric.
Just be sure beforehand to fold up both short ends
and make nice sharp corners at all four corners insead of just the two.
 All pinned down, it will look something like the picture below.
 When I begin stitching,
I start out using my pressure foot edge as a guide,
but if my pleat edges aren't straight, I have to eye-ball it to
keep the stitch line straight.
Using a ruler and fabric marker ahead of time to mark a stitch line
is really a good idea here.
 When I get to the edge of the book (center crease)
I do a pivet turn and stitch rather close to the edge,
pivot again and continue sewing down the other side.
 My design looks something like this after stitching.
I will then trim off any excess fabric like I show below.

 At the point, we are ready to do a little sewing
and turn this fabric into a notebook cover.
When you have done your decorating,
you will want to finish off the raw edges of the
cover by either using a serger, as I have done,
or use a simple zig-zag stitch.
Go around all four sides.
 Lay out your cover flat and fold up the flaps that will
become the pockets for the notebook,
right sides together.
This is the fold you ironed in earlier
along the marked line.
 Now, take the notebook
and lay the page edge of the book
right along that fold.
Center the book carefully.
 Take your fabric marker of choice and trace the top and bottom edge
of the notebook right onto the fabric.
This will be the line you will stitch along to
form the top and bottom of the cover's pockets.
Do this on both sides of the book cover.
You will have four stitch lines in total, one at each corner of the cover.
 Pin and stitch along all four line markings.
 Turn the corners right side out.
Get those corners nice and sharp.
At this point,
I always try the cover on my notebook.
I can make whatever adjustments I need
if the cover is too tight or to loose.
After you have made any adjustments
and made sure the fit is right,
press the cover nice and smooth.
Pay attention to the corners and the
top and bottom edges.
Pressing well will make a world of difference
in the look of the finished cover.
 After you have pressed the cover, slip it on the notebook.
Now, go out there and make some fabulous gifts!


Sew Happy,

Monday, October 11, 2010

Basic Burp Cloth Tutorial

I hope everyone had a super weekend. 
I know I did.
It just
went
too
fast.
Sigh.....
But I did do some
 web surfing this weekend.
I happened upon Lemon Tree Creations and a great post by
Erin
about Burp Cloths. 
She did a great job describing her process.
Burp cloths can be tricky and she asked for
some seasoned seamstresses to give some additional
tips to sewing a burp cloth.
I attempted to post a comment and really
did not feel like I had done a clear enough job.
So, she inspired me to put together
 this little tutorial. 
 So, this tute is dedicated to Erin at Lemon Tree Creations and all
those out there that would appreciate some additional tips.
Erin, you rock! 
Thanks for the wonderful tutorial.
Hopefully, I can only add to what you have already explained.

 You will need:
*prefolded, prewashed and dried cloth diaper
*100% cotton fabric, about 20"x8.5" (this is pretty generous)
*matching thread
*poster board, about 18.5" x 4.5"
*walking foot (not required, but very helpful)
*spray starch
*iron
*pins

First, I want to stress the importance of
prewashing and drying
both the fabric and the diaper. 
Cotton is an ideal
fabric for burp cloths because of its absorbt quality
and softness agains
baby's skin.
For more about cotton, look here for
my article about cotton.
Washing and drying will preshrink the fabric.
The last thing you want is to wash such a labor of love
only to find that the cotton has shrunk and you have a puckered mess.
Yuck!
So, don't be tempted to skip this step.

However,
the diaper is going to feel limp and poorly shaped,
not ideal if you want a
 nice,
 neat
finished product.
That's when I pull out the spray starch and my iron.
Iron the diaper with a light spray of starch
and shape it into a nice square.
This will give you a really nice base to work with. 
The diaper weave is rather loose
and can shift
so
easily
that anything you can do
to keep that shifting from happening
will be
worth
the
extra
effort.
Cut an 8.5" x 20" piece of fashion fabric. 
Press and lightly starch this also.
Previously,
I cut a template out of poster board measuring
20"x8.5"
This is large enough to give me lots of
wiggle room
as I'm fitting the panel of fabric on
diapers that can
vary a tad in size.
With the fashion fabric wrong side up,
center the poster board template
on the fashion fabric.
Using the iron,
press up the long sides along
the template on both sides. 
This will help you create
an even, neat panel of fabric.
Fold up the ends in the same manner with one end
without
a permanent crease just yet.
This one end will be your
"adjusting"
end.
When you have made the proper length adjustment,
you can press that end.

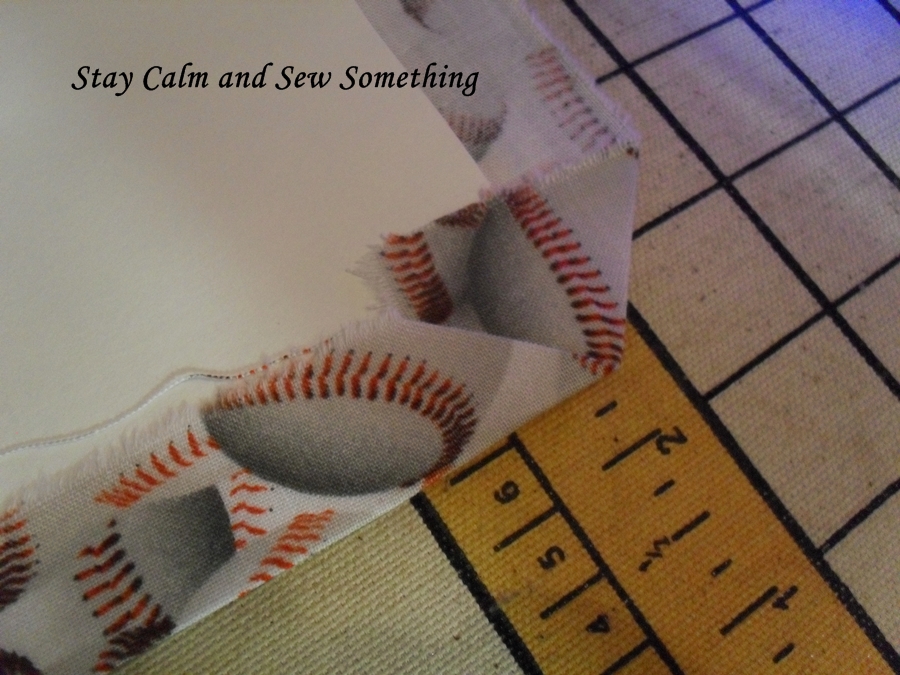
Now for the corners. 
Diagonally
 fold a corner of the fabric
onto the template.

Fold the side fold and top folds
 onto the corner so you have a nice
sharp corner.
This picture probably illustrates better
what I'm trying to say.
You will have nice points on all four corners.
Flip it over,
center it on the diaper
and pin down
adjusting
the
placement
of the diaper as you go.
One one end,
you will see an overhang of fabric.
Pin mark this,
take it to the ironing board and press the
end to the proper adjustment to fit.
Go back and pin the fabric all back on the diaper
making sure it is
positioned the way you want it. 
Don't
be
afraid
to
use
pins.
They will help control the fabrics and
hold them in the correct
position of sewing.
Now, here's my secret weapon. 
My walking foot.
I do hope that you have one and use it. 
If you don't
you are really missing out.
If you don't have one,
get one to fit your machine
and use it.
You will be glad you did.
 A walking foot helps to feed both layers of fabric
 under the pressure foot
more evenly
 and there won't be that
"slide"
between layers that can cause
puckers,
difference in layer lengths,
stretching of fabrics and such.
When you are working with diapers and their loose weave,
this will be a lifesaver.
Load the walking foot according to your machine's instructions.

And begin to sew. 
Go
SLOW! 
You just can't rush a walking foot
or a project that you want to turn out especially nice.
Take care to stitch fairly close
to the edge of fabric evenly.
Slowing down gives you the
control you need to do this.
Make sure to do a pivot at each corner
and go all the way around
the square. 
 Do a small backstitch.

 Go back to the ironing board and press the diaper and fabric
flat
and
smooth
again. 
 I don't know that you can see
really clearly, but one side of the diaper is pressed in the picture above
and one side isn't. 
Can you see the difference? 
Pressing makes a great presentation and makes you
work look
professional.
So, lets review. 
*Press with a light coat of starch. 
*Use a template to help create a straight, even panel
*Pin, pin, pin.
*Use a walking foot if you possibly can
*Take your time and SLOW DOWN!
* Press, press, press
 These little hints will make your burp cloths
look perfessional.
Etsy ready!
Gift ready!
Great!

 Sew Happy,
Suzie

I ATTENDED THESE PARTIES AND MORE ON MY LINKY PAGE


mmm button


Texas Monkey


Keeping It Simple
Making


Photobucket
Photobucket

LinkWithin

Related Posts Plugin for WordPress, Blogger...